
Navigating Your Photo Gallery

Your photo gallery is ready! Now what?
Your online photo gallery can be shared with your loved ones. It’s also where you can download all of your photos for printing, sharing, and safe-keeping, and you can also order photo prints directly through the gallery link. I’ll guide you through all of the steps here.
Feel free to share your gallery link with any chosen family or friends. They can sign in using their own email addresses—this makes it easier for them to download photos or order their own prints.
For a wedding, the photos are separated into different parts of the day: getting ready, the ceremony, and the reception. There’s also a folder of photos that I call the Highlights—my favorite photos that I think tell the best story of your wedding day. The All Photos folder is exactly what it sounds like—it holds all of the photos from your gallery in one place.
“Favorite” Photos

Want to have a folder of just your fave pics from the session? Click on the star under a photo to add it to your “Favorites.” To view only these photos, return to the main gallery page, scroll to the top, and click on the “Favorites” tab at the top of the screen. This is a great way to pick your faves for an album or for printing.
Download Photos
There are multiple ways to download photos. I’ll begin with the process of downloading a group of photos all at once—either the All Photos folder, or a Favorites folder, for instance. This needs to be done on a computer, because you will receive a Zip File of the photos.
Go to the folder of photos that you would like to download. At the top of the page, you will see a “Download All” option. Click here. A pop-up will appear, giving you the option to Download All in either Original Size or Social Media Size. Original Size is what you want for backing up and saving your photos. This is also the option you choose when you want to print the photos. The Social size is for sharing on social media or posting online. Click the version you would like to download.

You will be taken to another screen to wait for the download. You will also receive this download link via your email address that you entered when entering the gallery.

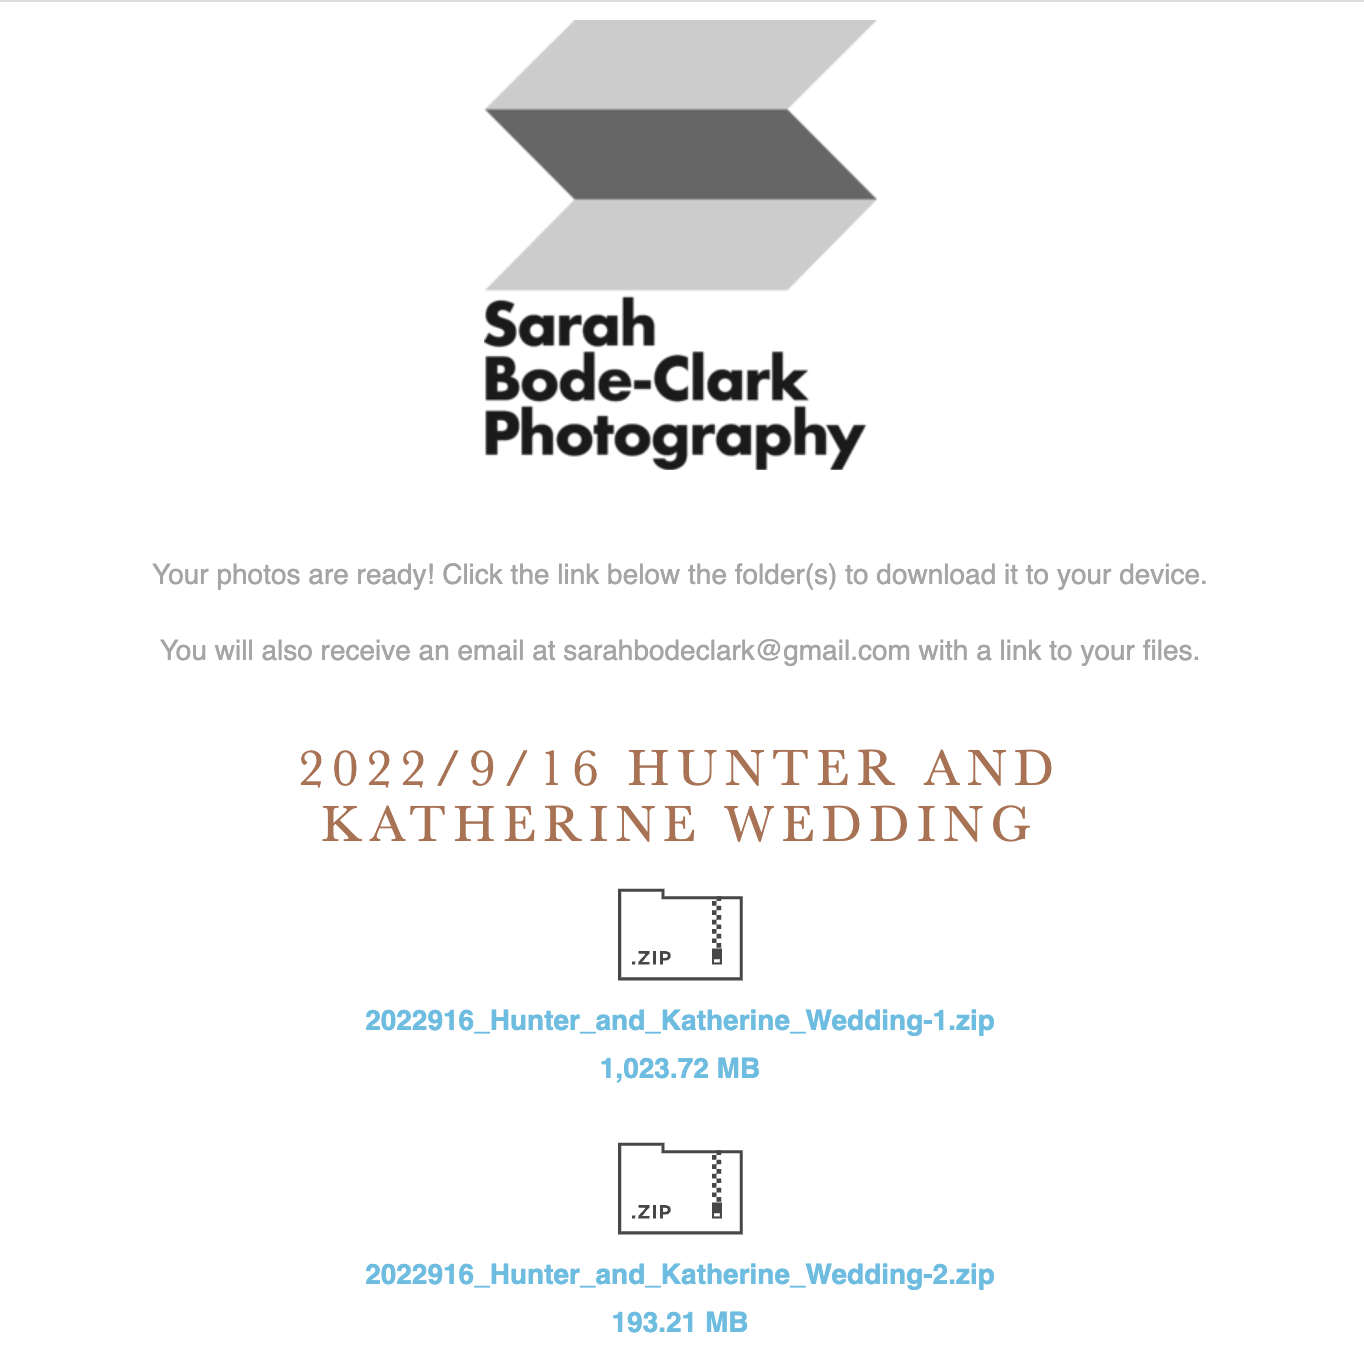
Once you receive the link to your inbox, click on it. You may be asked to enter your email address again. This will take you to the page with the Zip Files for you to download. There may be more than one Zip File, especially if you are downloading your whole wedding gallery. Click on each download link to download each Zip File. These will need to be unzipped to access the photos, but then they are ready for viewing, printing, and backing up.
You can also download individual photos on your computer. This process is more straight-forward. Click on the photo you’d like to download, and select the Download option below the photo. You have the option again of Original Size (for printing) or Social Size (best for sharing online or on social media). This will download the individual photo to your computer.

Download Photos on Your Phone
You can download photos one at a time on your phone or mobile device. First, click on the image you’d like to download from the gallery.

Next, click on Download below the photo.

Select Original for printing the photo. Select Social to share to social media or online.

Choose the option to “View” the photo.
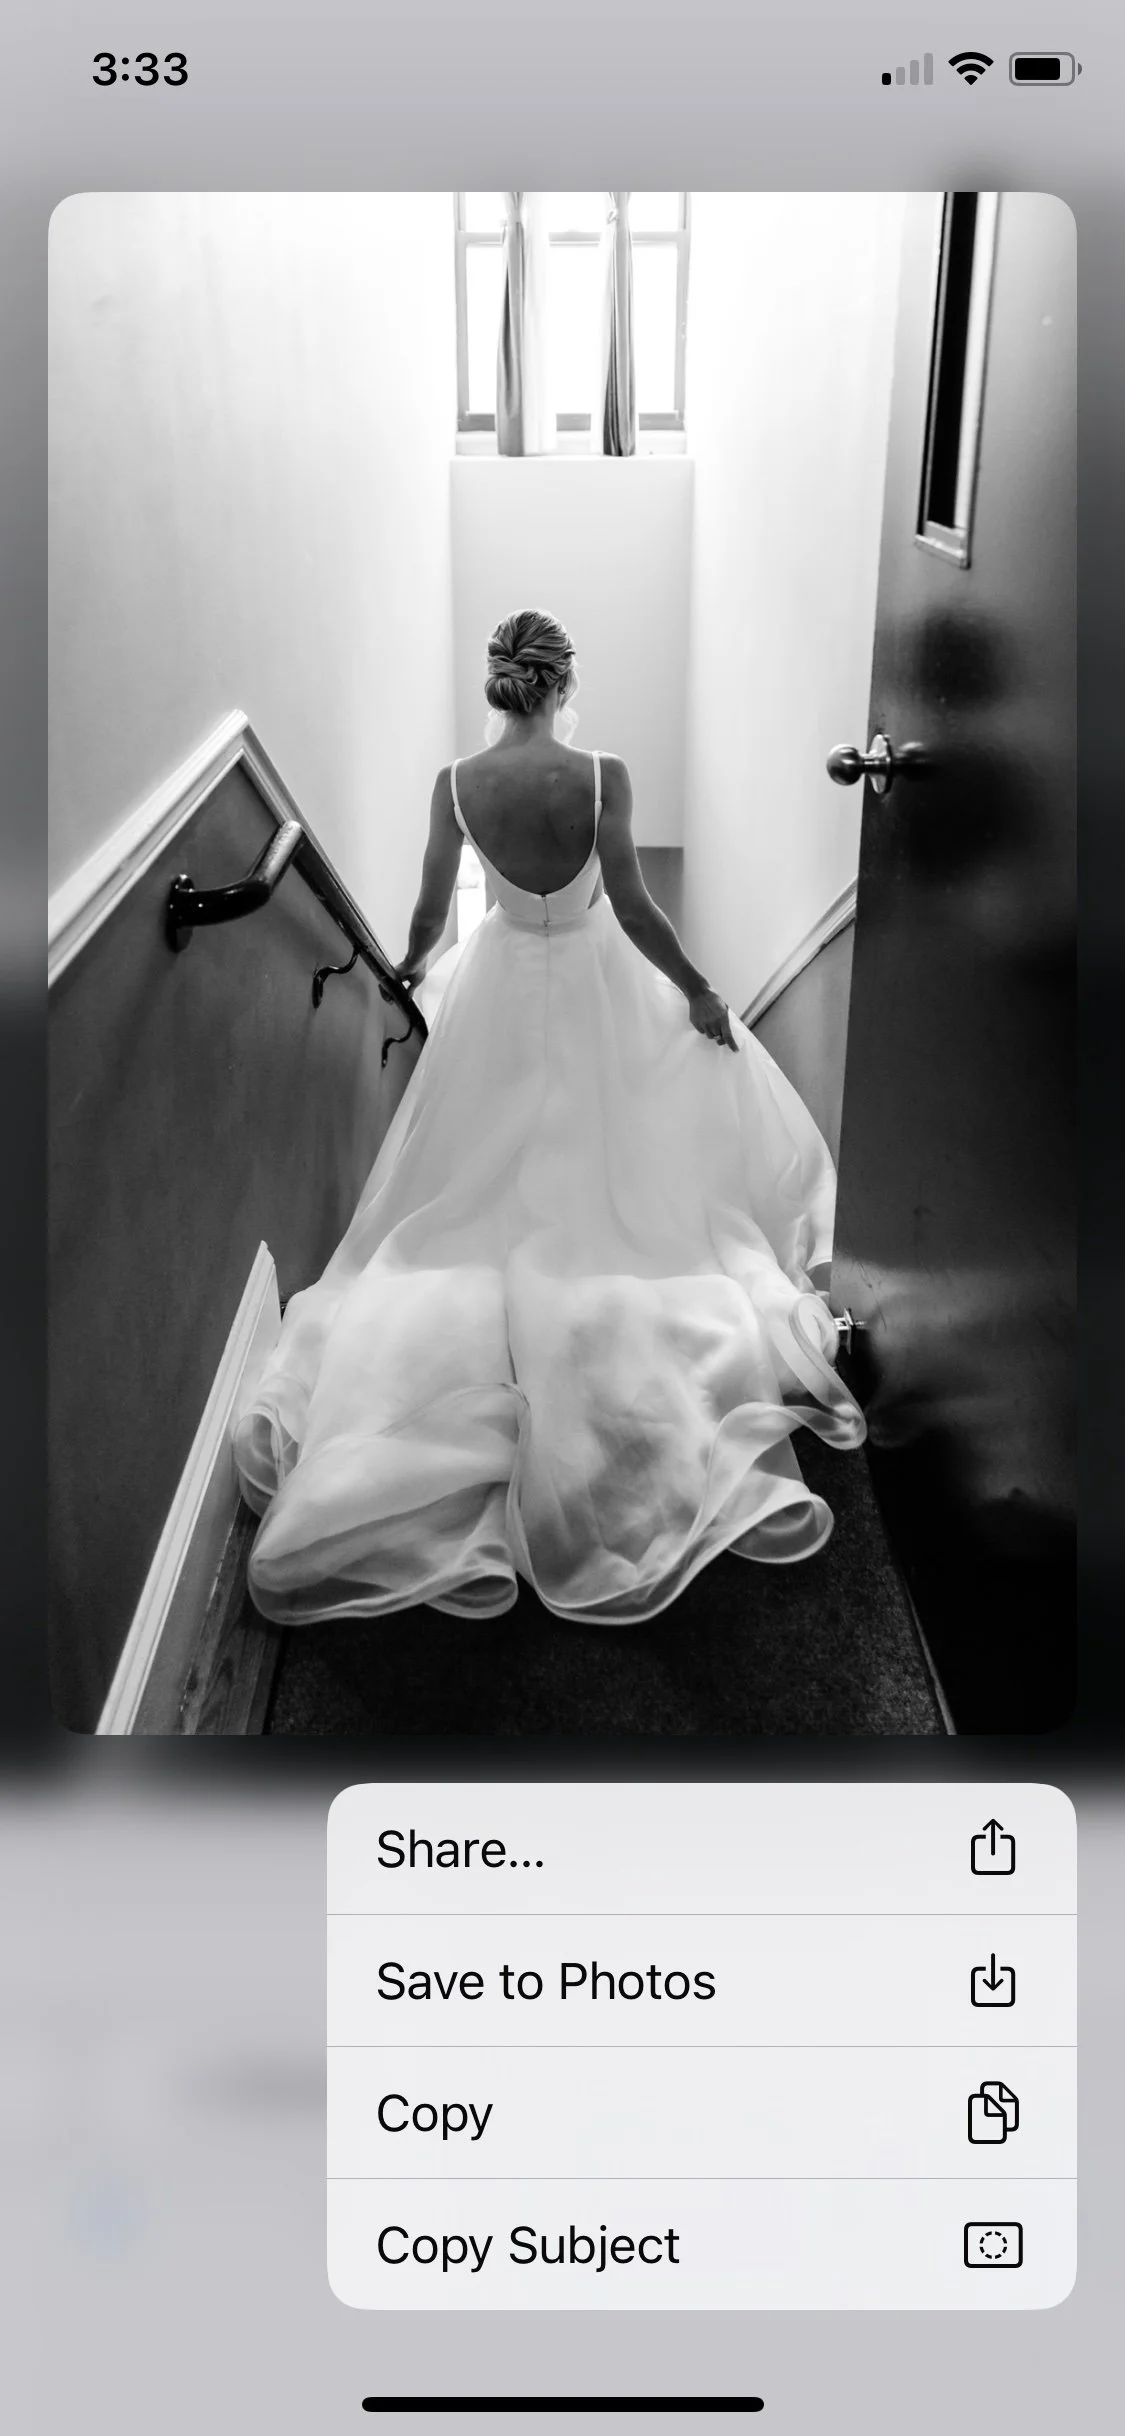
Now, hold your finger down on the photo, and when the pop-up appears, select “Save to Photos.” The photo should now be in your phone’s photo gallery.
Purchase Prints

You can buy basic prints of your photos directly from the gallery. Click on a photo and then click the “Buy” button in the upper right-hand corner. A pop-up will appear with basic print sizes. Add to your cart and follow the instructions to complete the purchase. Want to purchase large prints, framed prints, canvases, an heirloom photo album or something else? Just reach out, and let me know your vision, and I’ll guide you through the process to receive professional prints of your favorite photos.

Backing Up Your Photos
Your online gallery will be available for one year after your wedding. I recommend you download all of your images right away so you don’t forget. I also recommend creating a back-up of the photos for yourself. I’d recommend putting a copy of the photos on an external hard drive or thumb drive that you keep in a safe spot (a fireproof safe is great, if you have one!). I also recommend using cloud storage for another back-up, just in case. Dropbox, Google photos, or your general cloud back-up program like Backblaze are all good options.